If you have purchased the C220-P Cleaning Station, disassemble and install the Cleaning Station according to the C220-P Cleaning Station user manual to install new powder in the Cleaning Station. You should always install new powder in the C220-P Cleaning Station.
Powder types currently supported by C220-P Cleaning Station:
- Raise3D PA12 Black Powder/ Raise3D PA11 Black Powder/
- Raise3D PA12 GB Black Powder/ Raise3D TPU90A Black Powder/
- Raise3D TPU90A White Powder/ Raise3D TPU86A Black Powder/
- Raise3D TPU86A White Powder/ Raise3D PA NEXT Black Powder/
- Raise3D PA NEXT GB Black Powder
- Support selected third-party materials
- Optional fully open material license available
For more information, lease visit Please visitRaise3D RMS220 Powder.
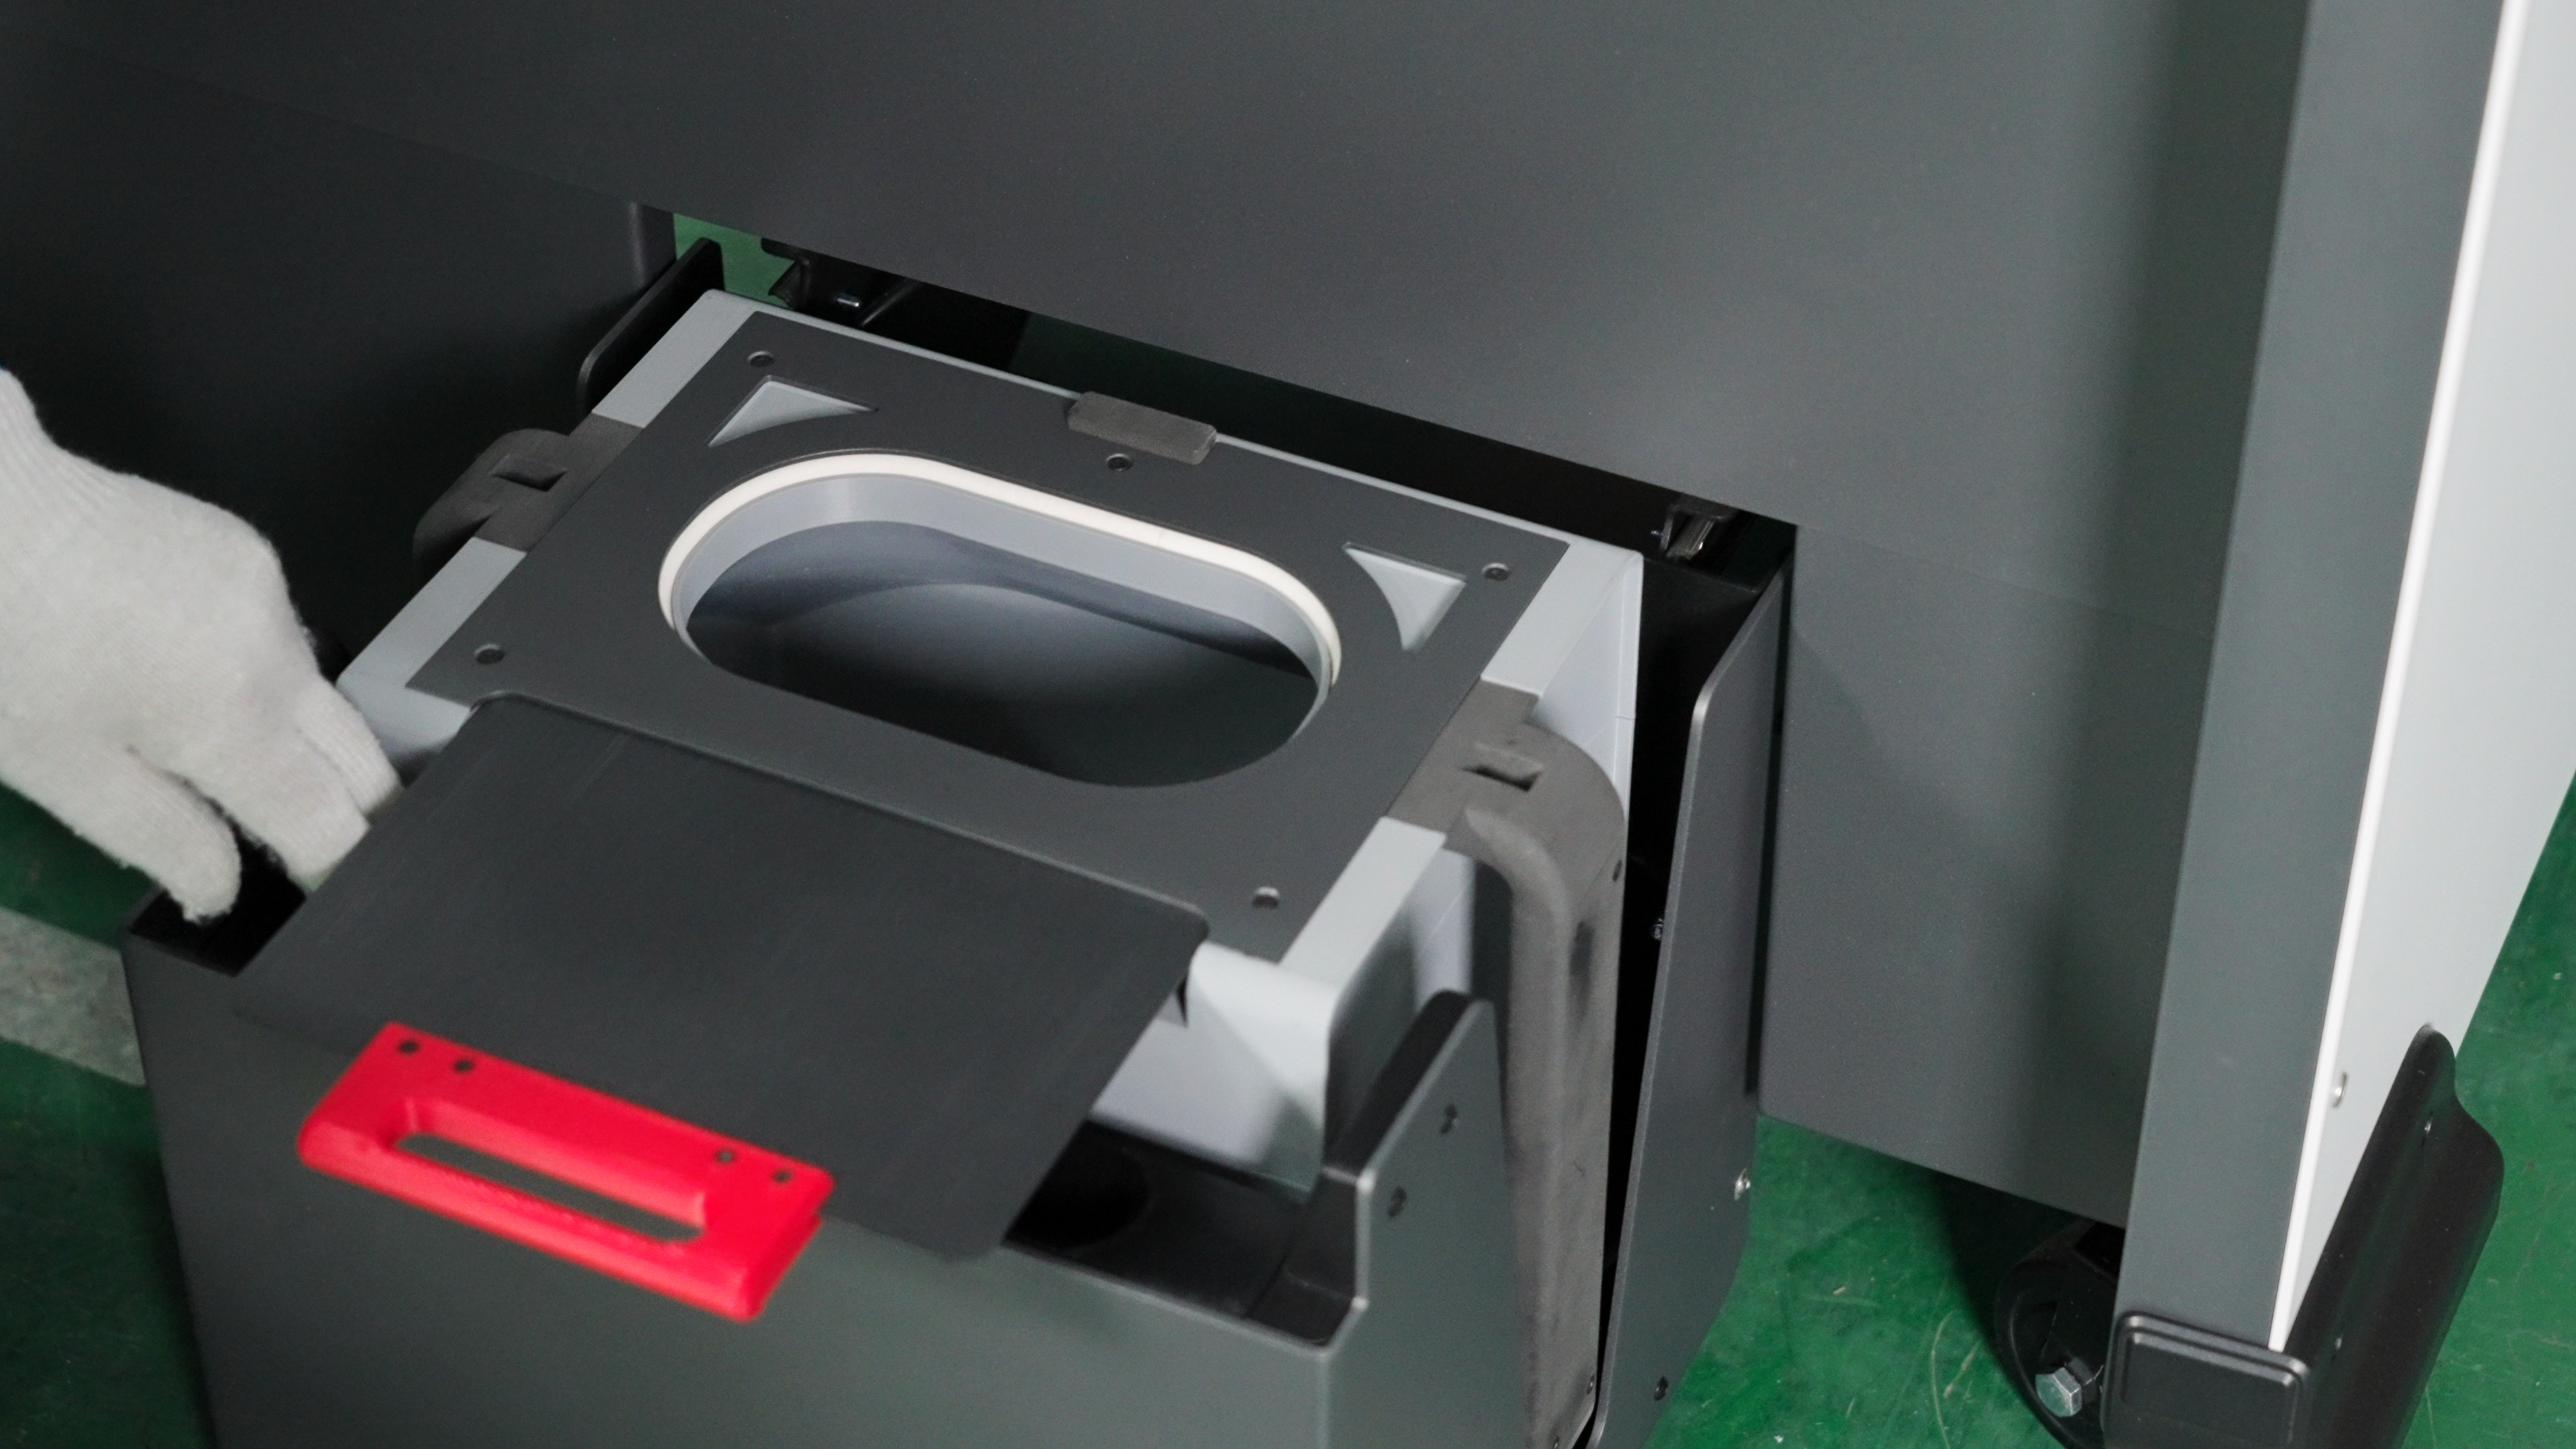
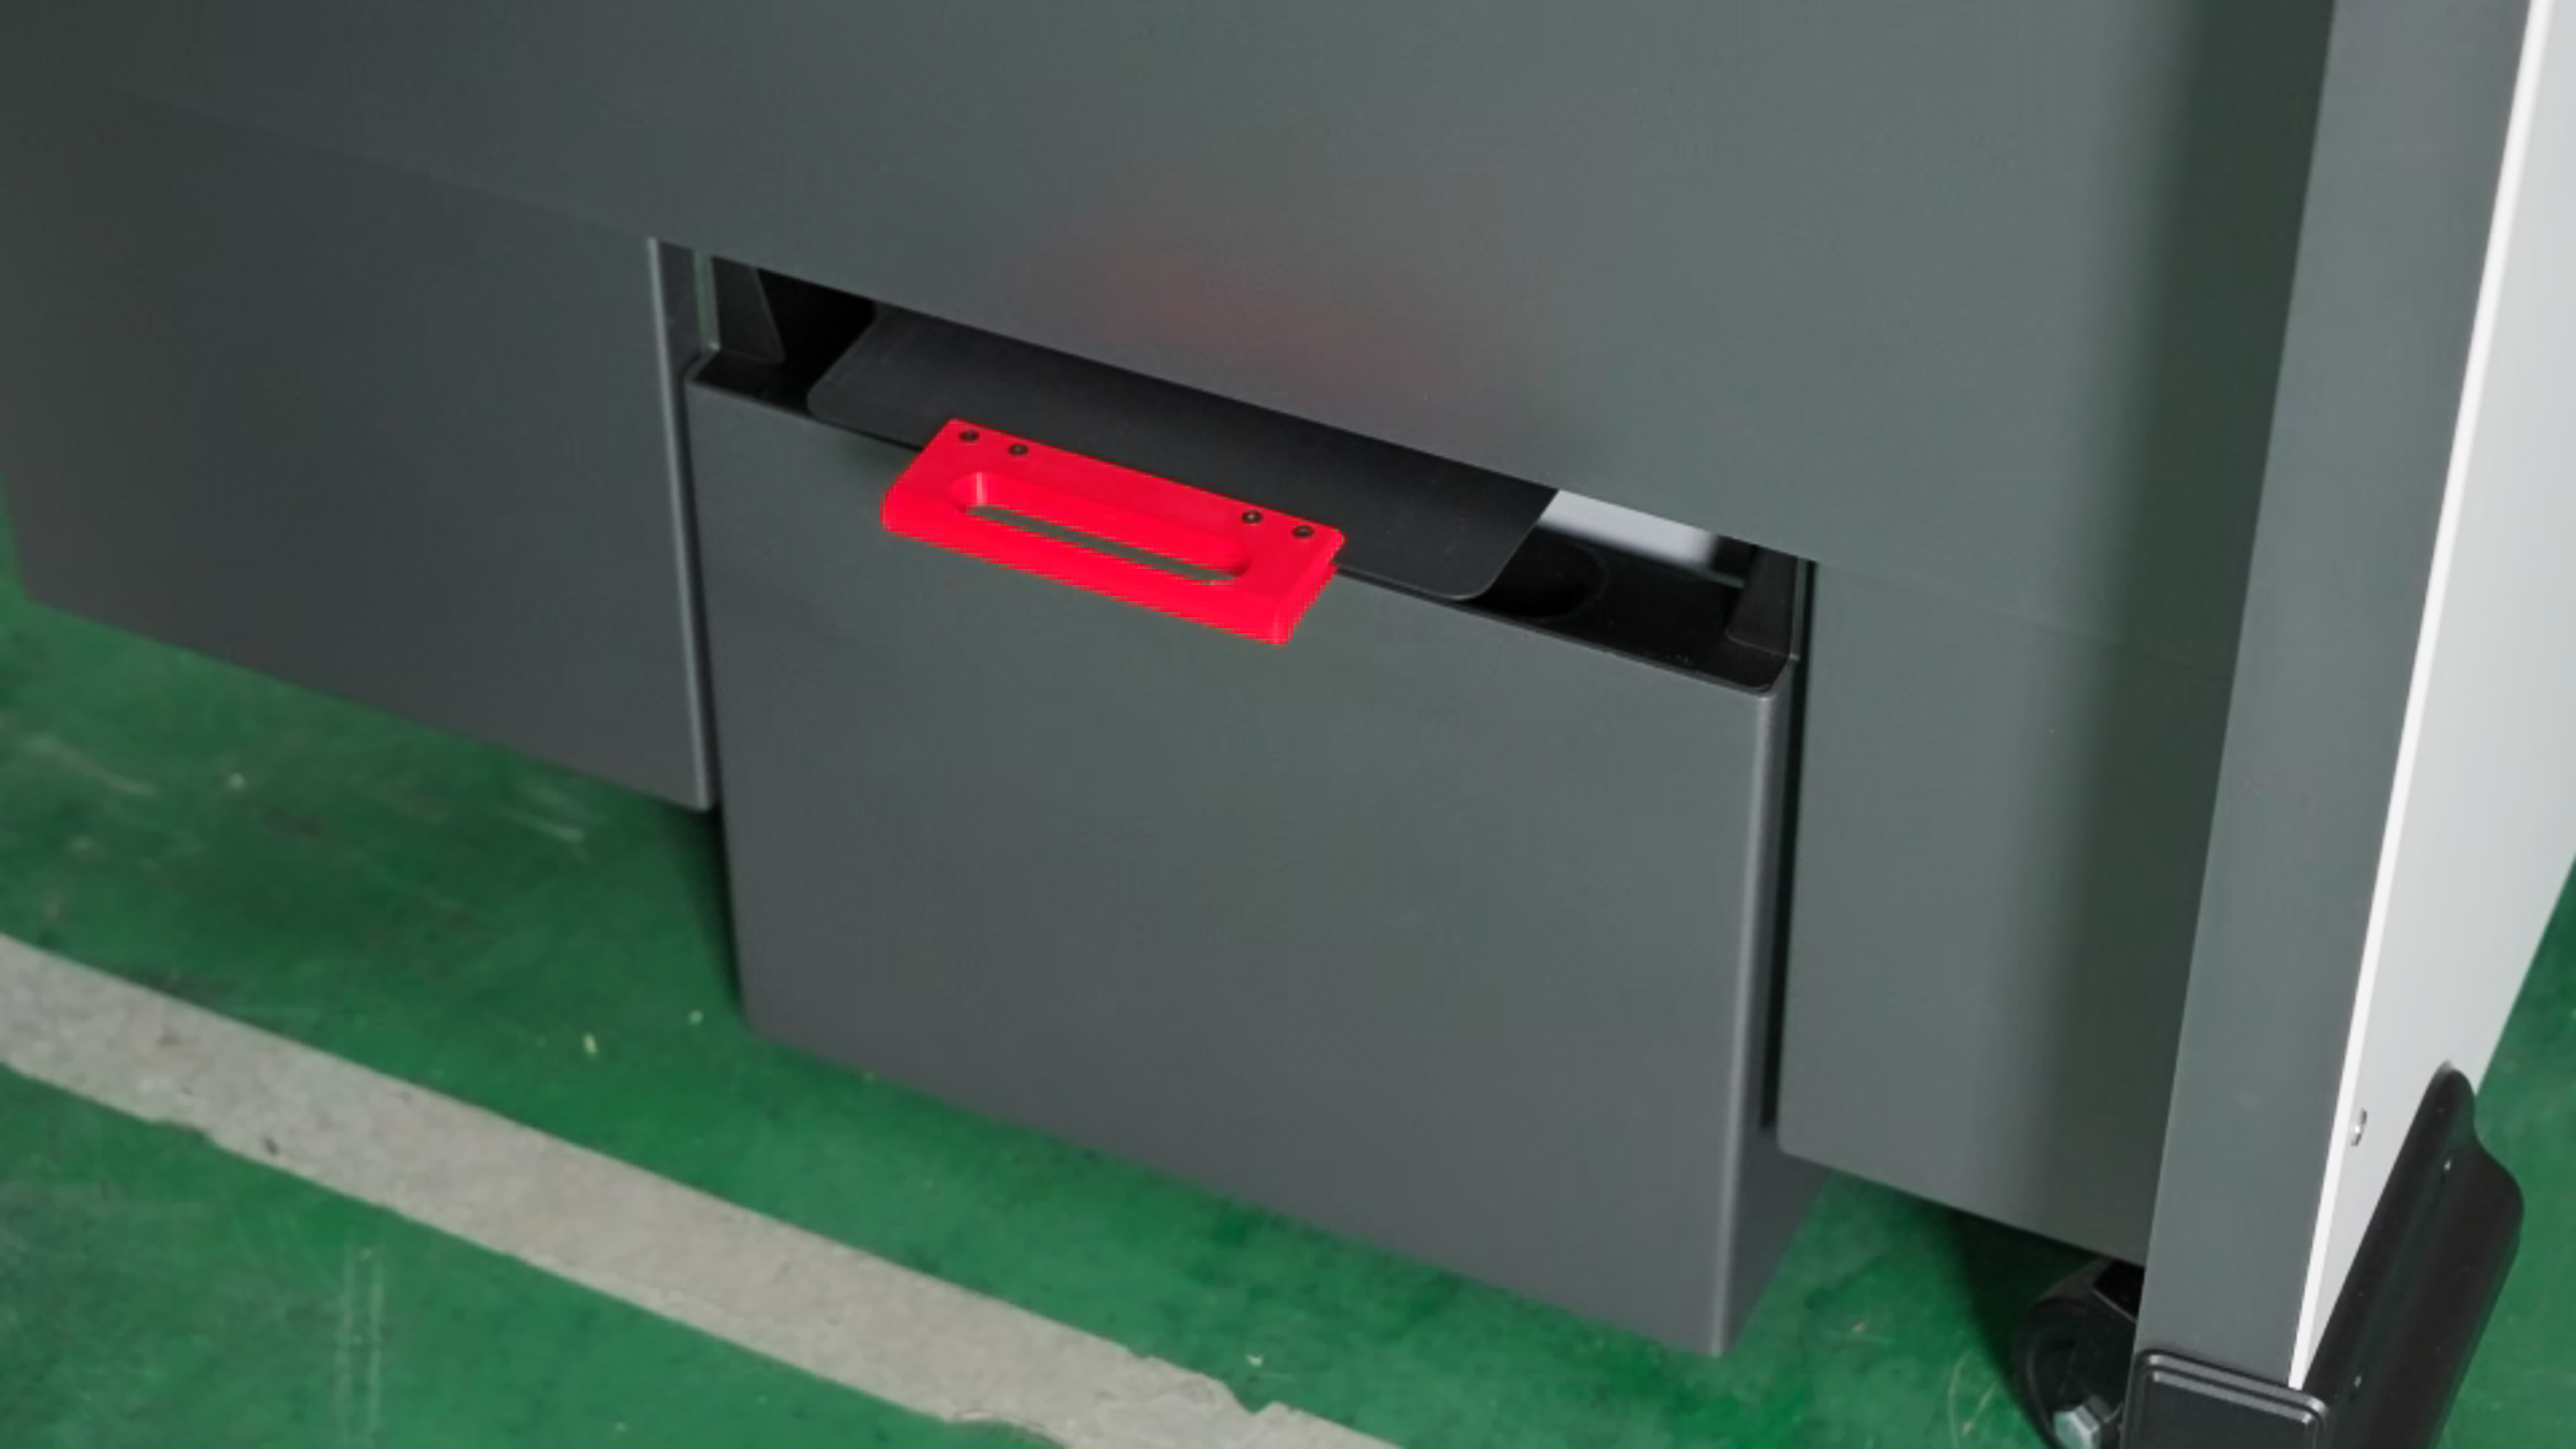
- Open the powder cartridge valve and put it into the drawer at the bottom of the Cleaning Station. The red handle is facing out.
Note: The resistance of opening the cartridge valve is large, please open it with force.
-
Close the bottom weighing mechanism.
-
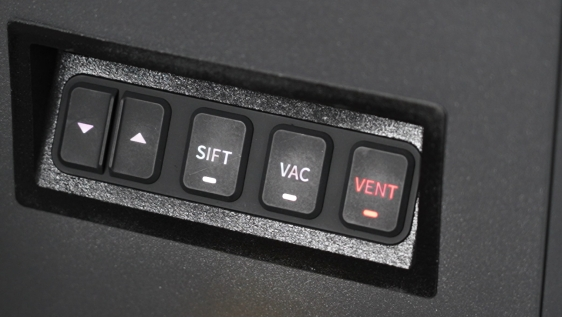
Click the "VENT" button on the front right side of the operation panel of the Cleaning Station to open the ventilation and lighting of the equipment operation platform.
-
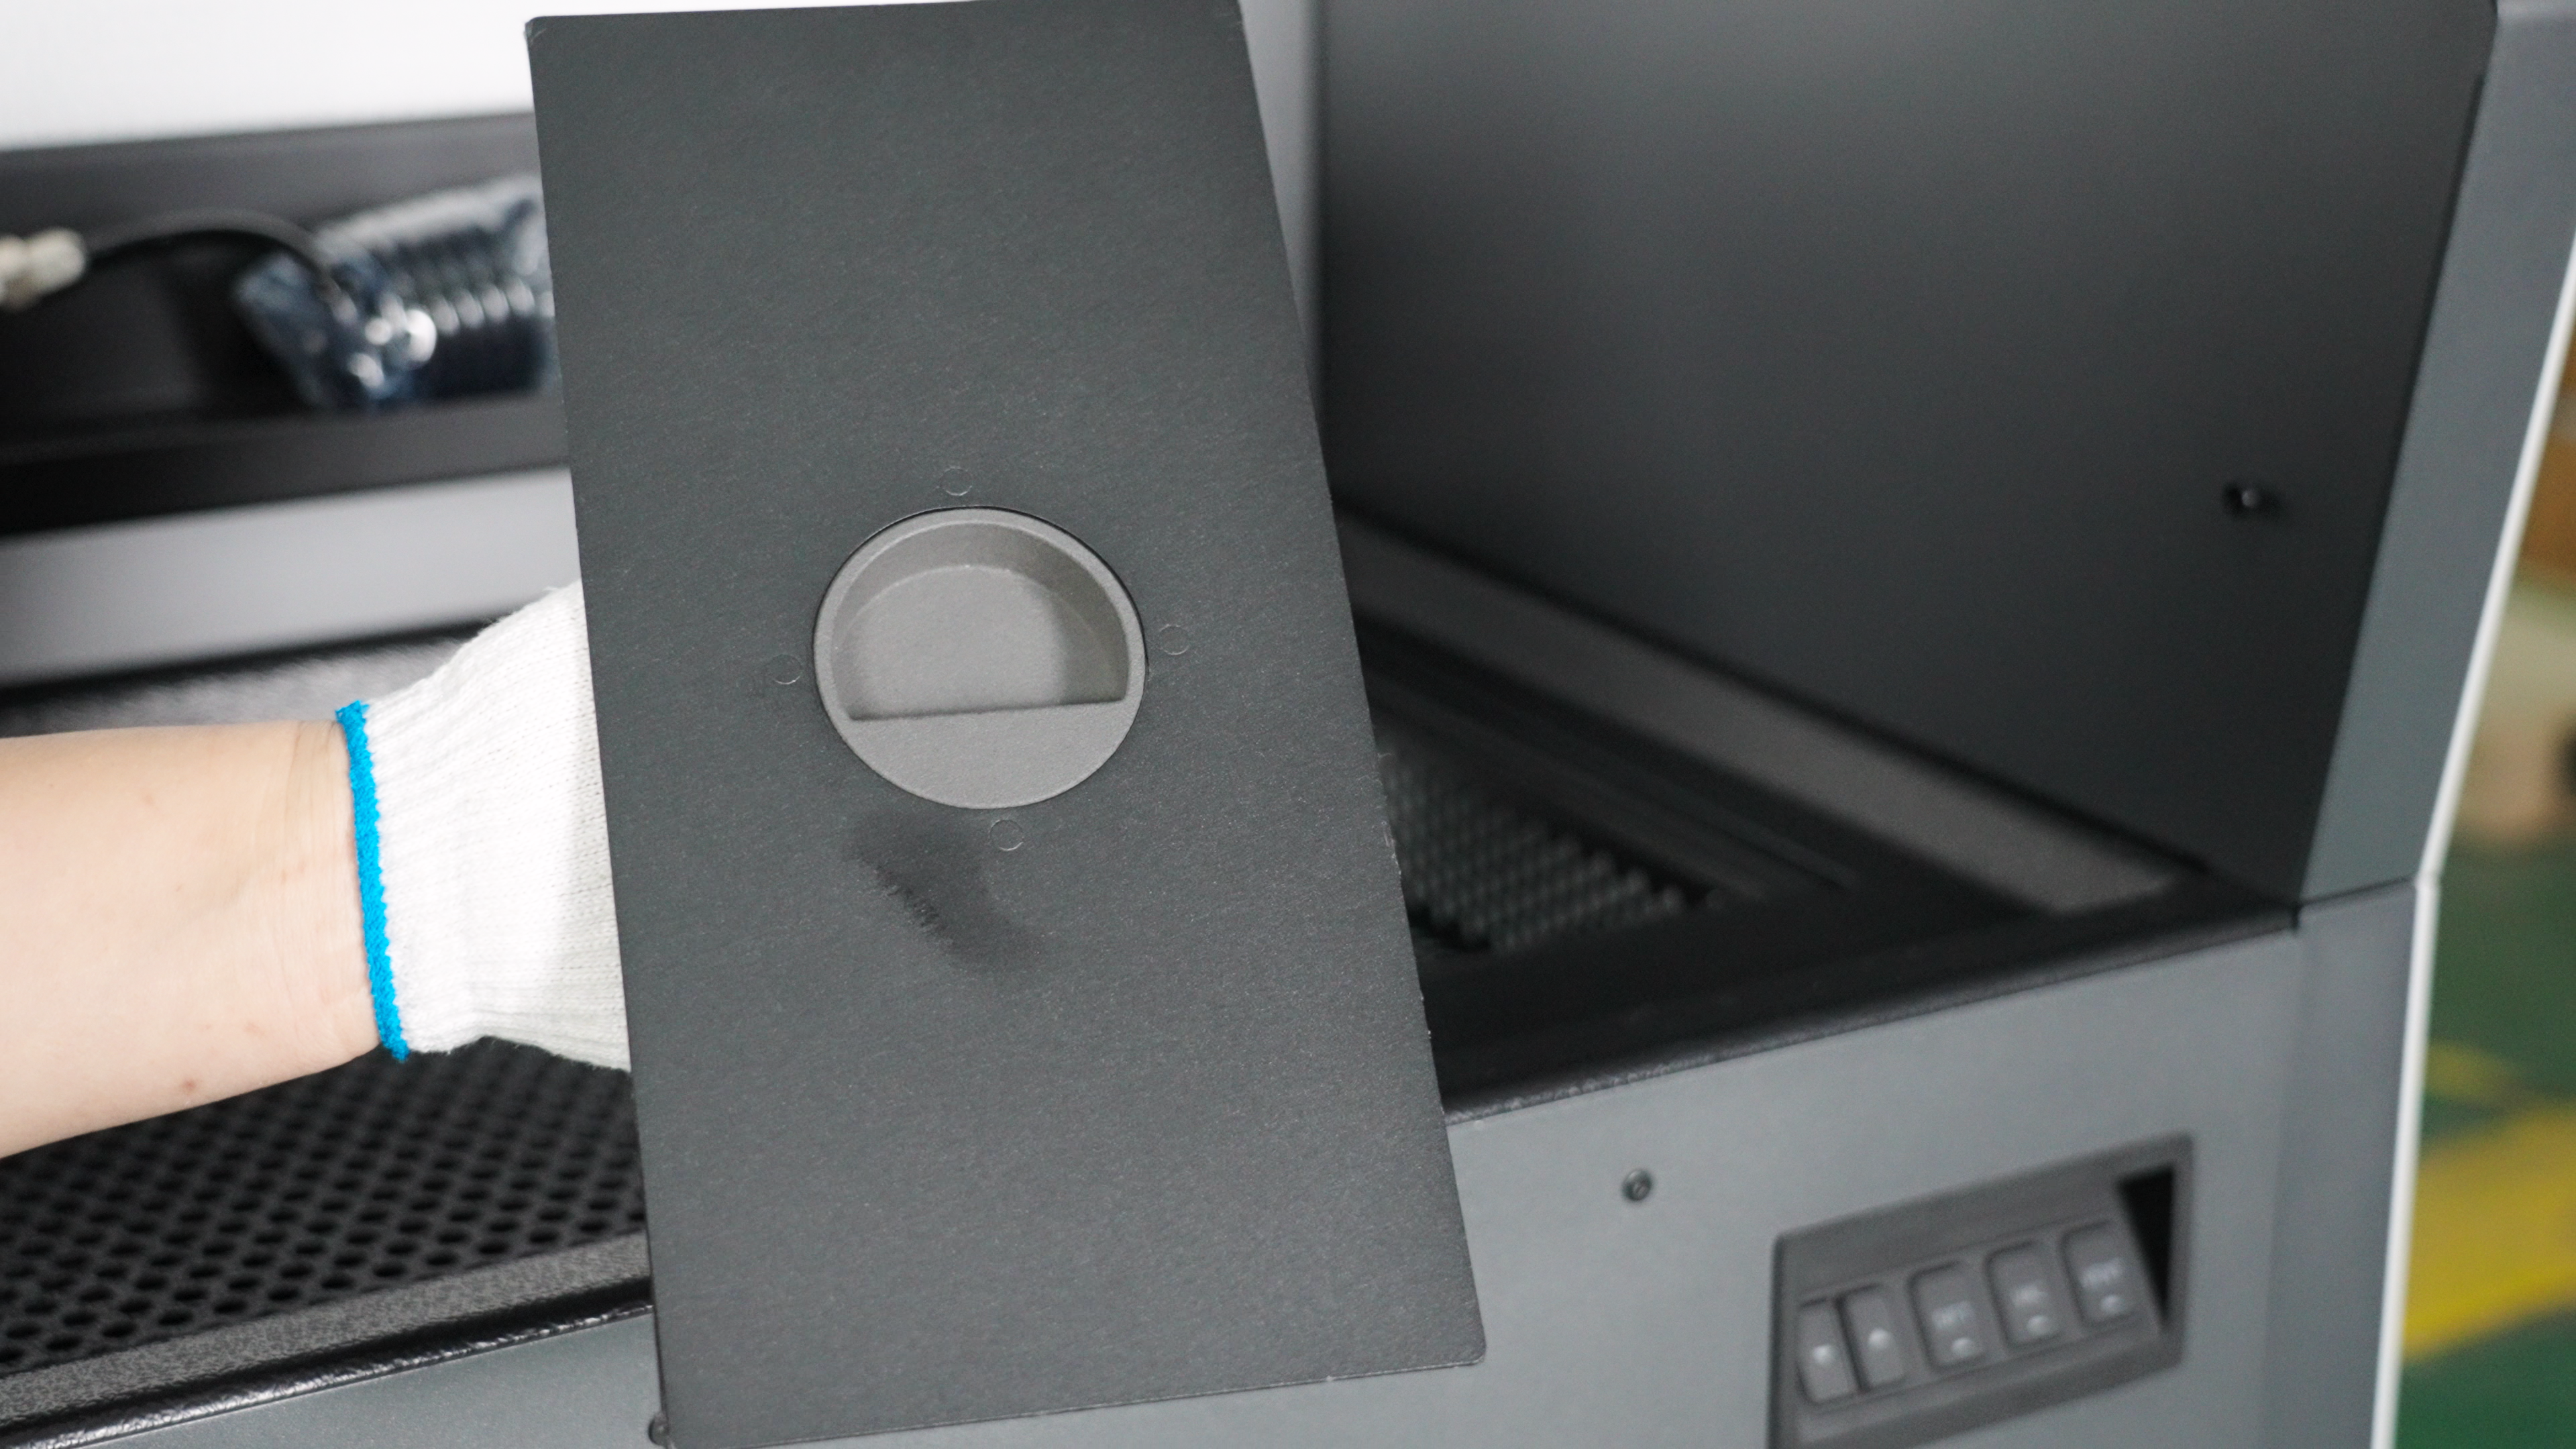
Open the new powder hopper cover plate on the right side of the operation platform of the Cleaning Station, and pour the new powder into the new powder hopper. You can use gloves to prevent dust pollution.
-
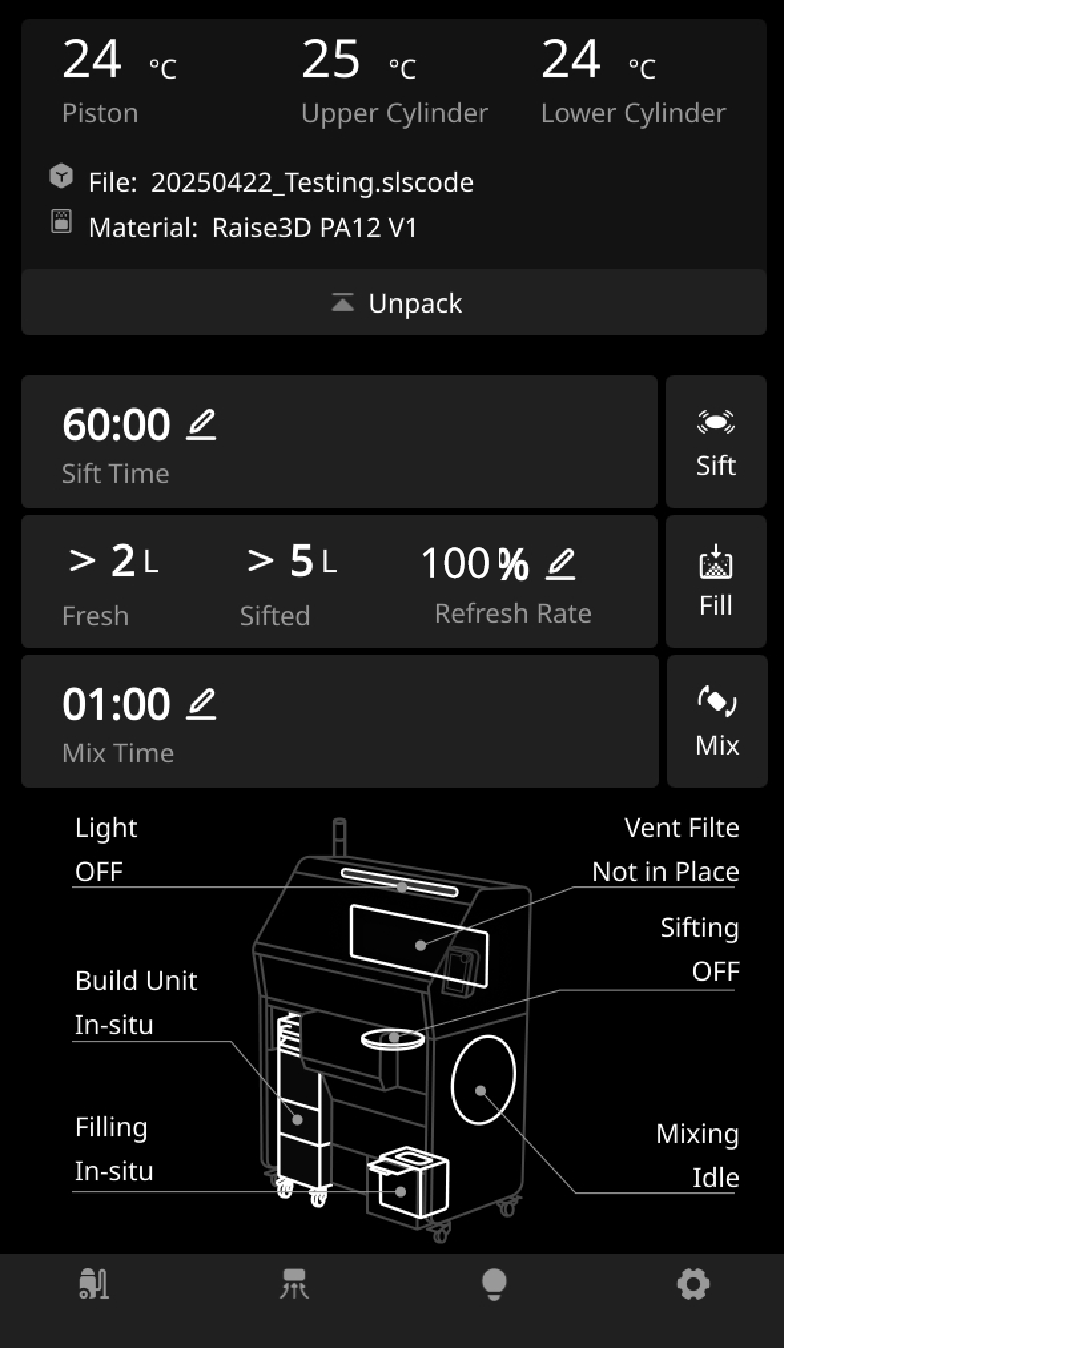
Since you are installing new powder, you need to output "100%" at the powder refresh rate on the touch screen panel of the powder clearing station, as shown in the red box area below. Click the "Mix" button and wait for the mixing to complete.
-
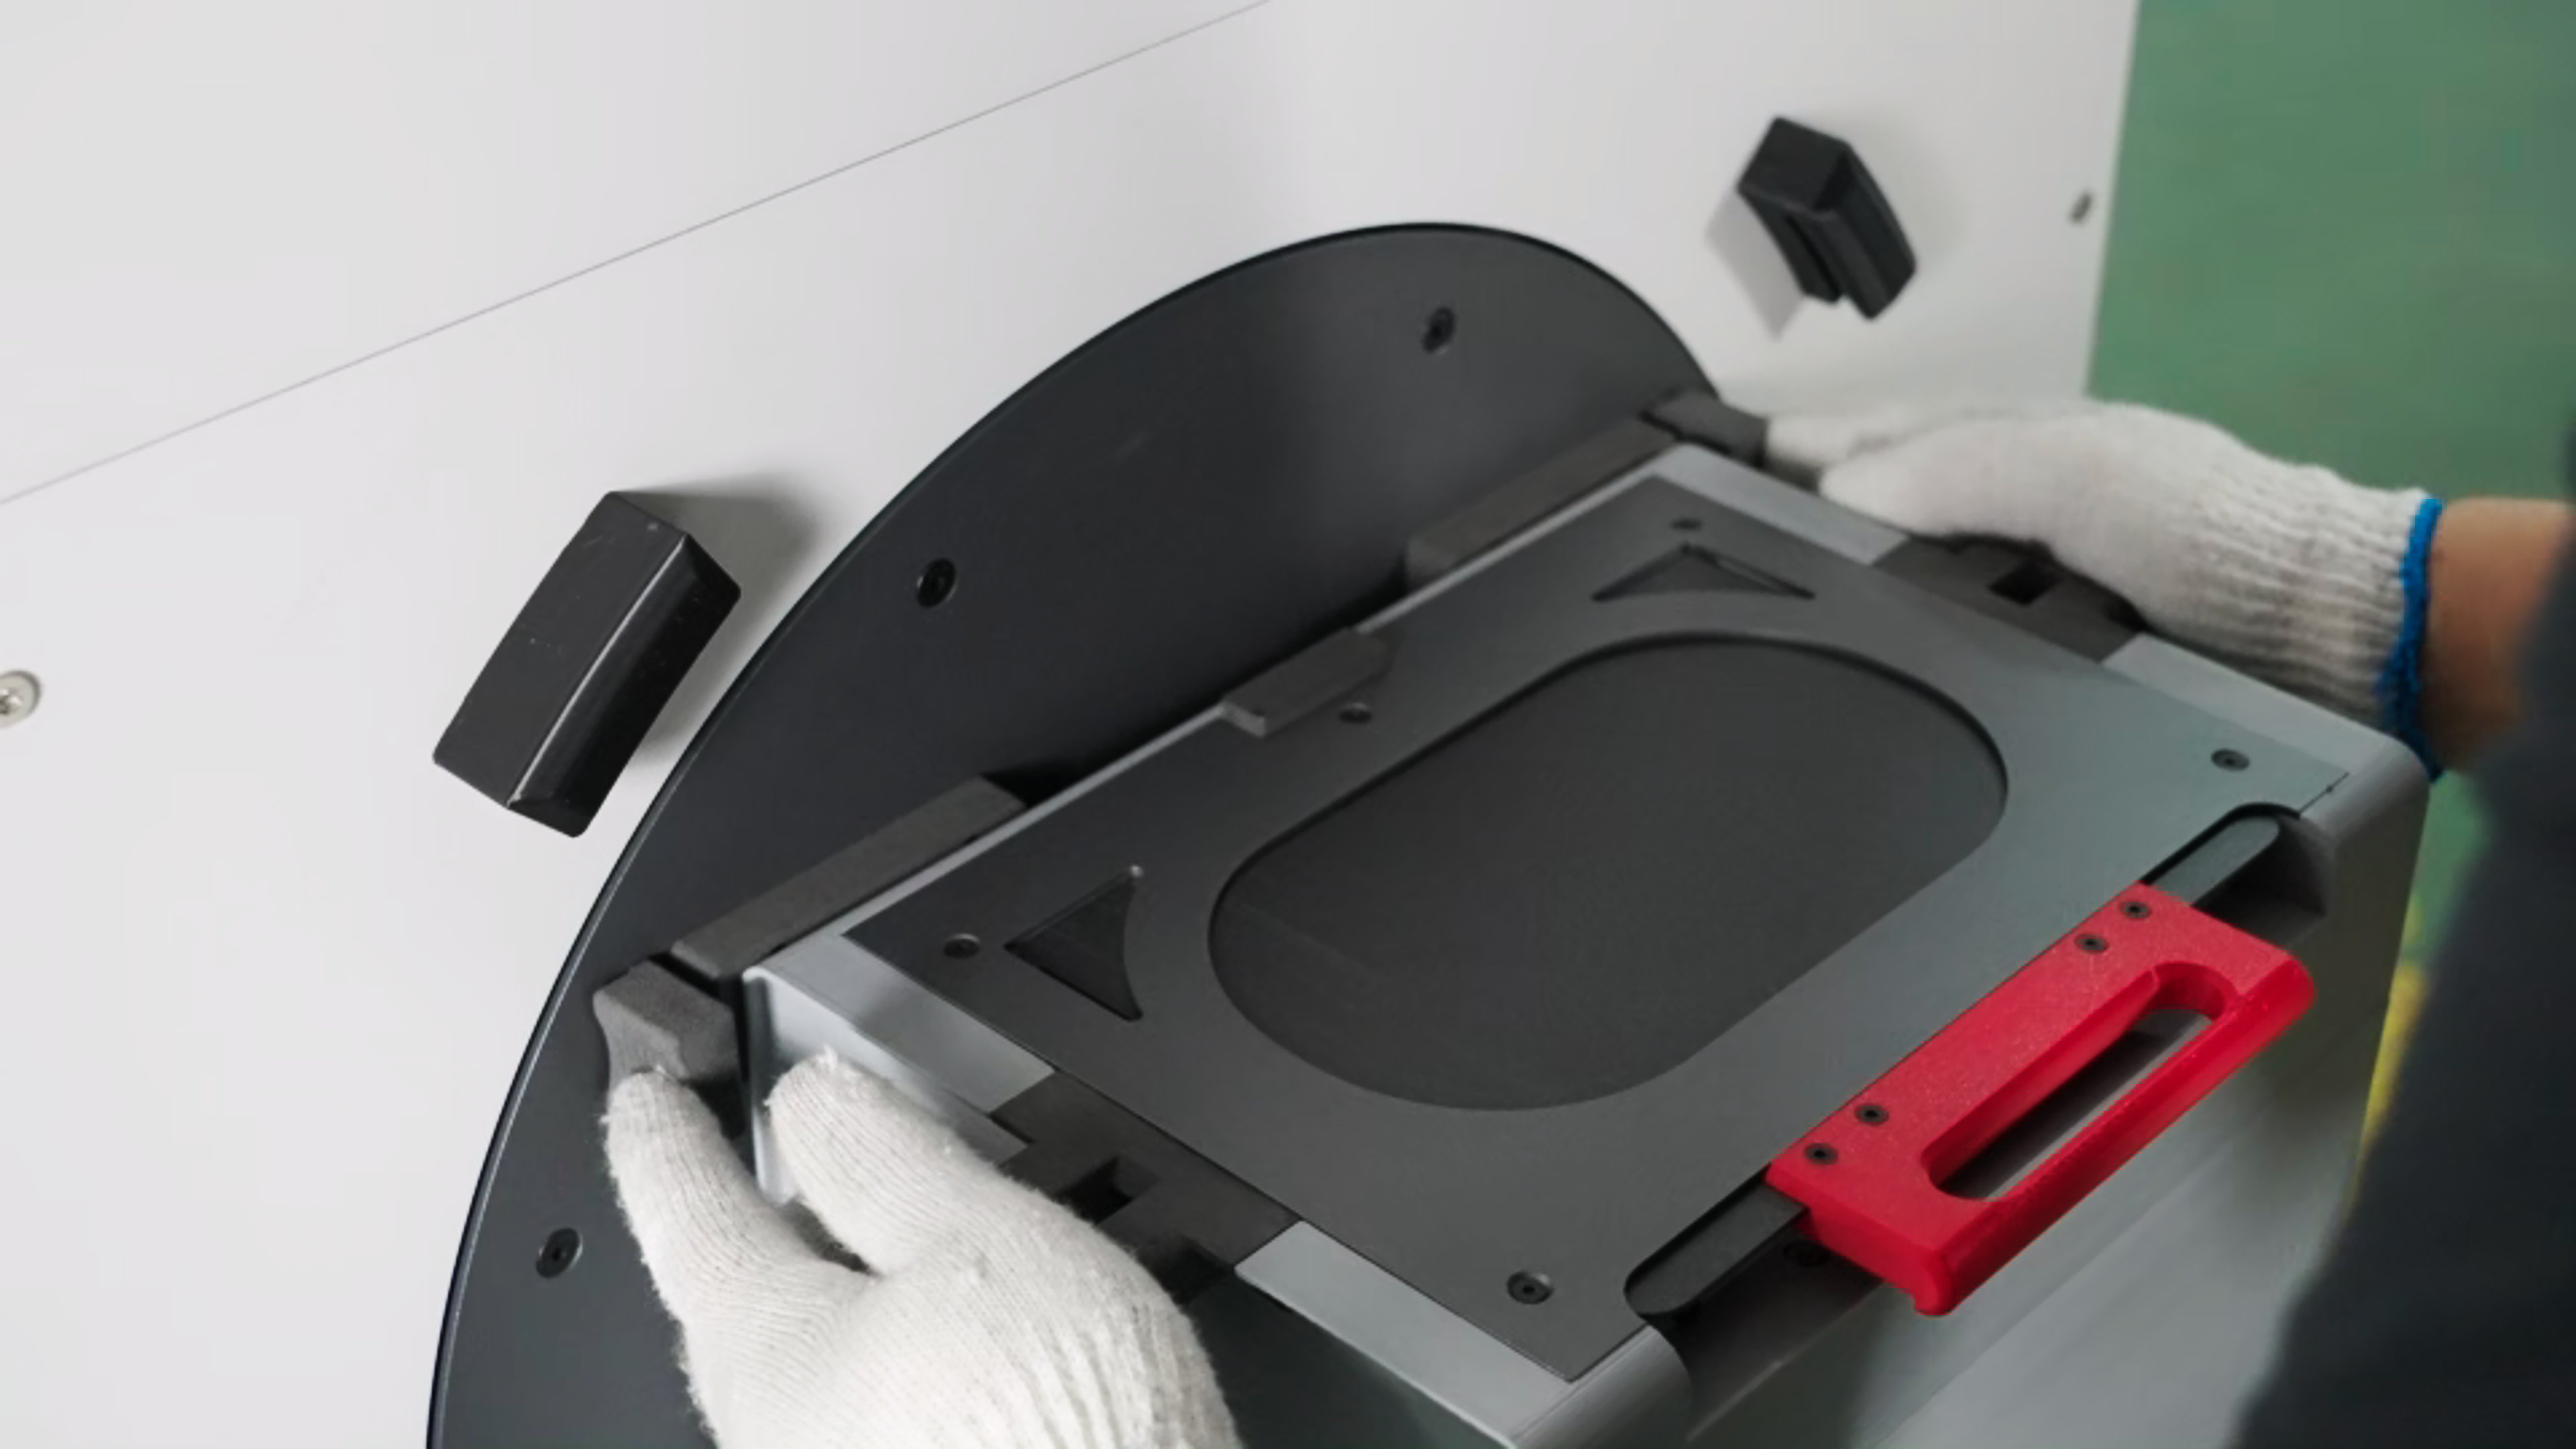
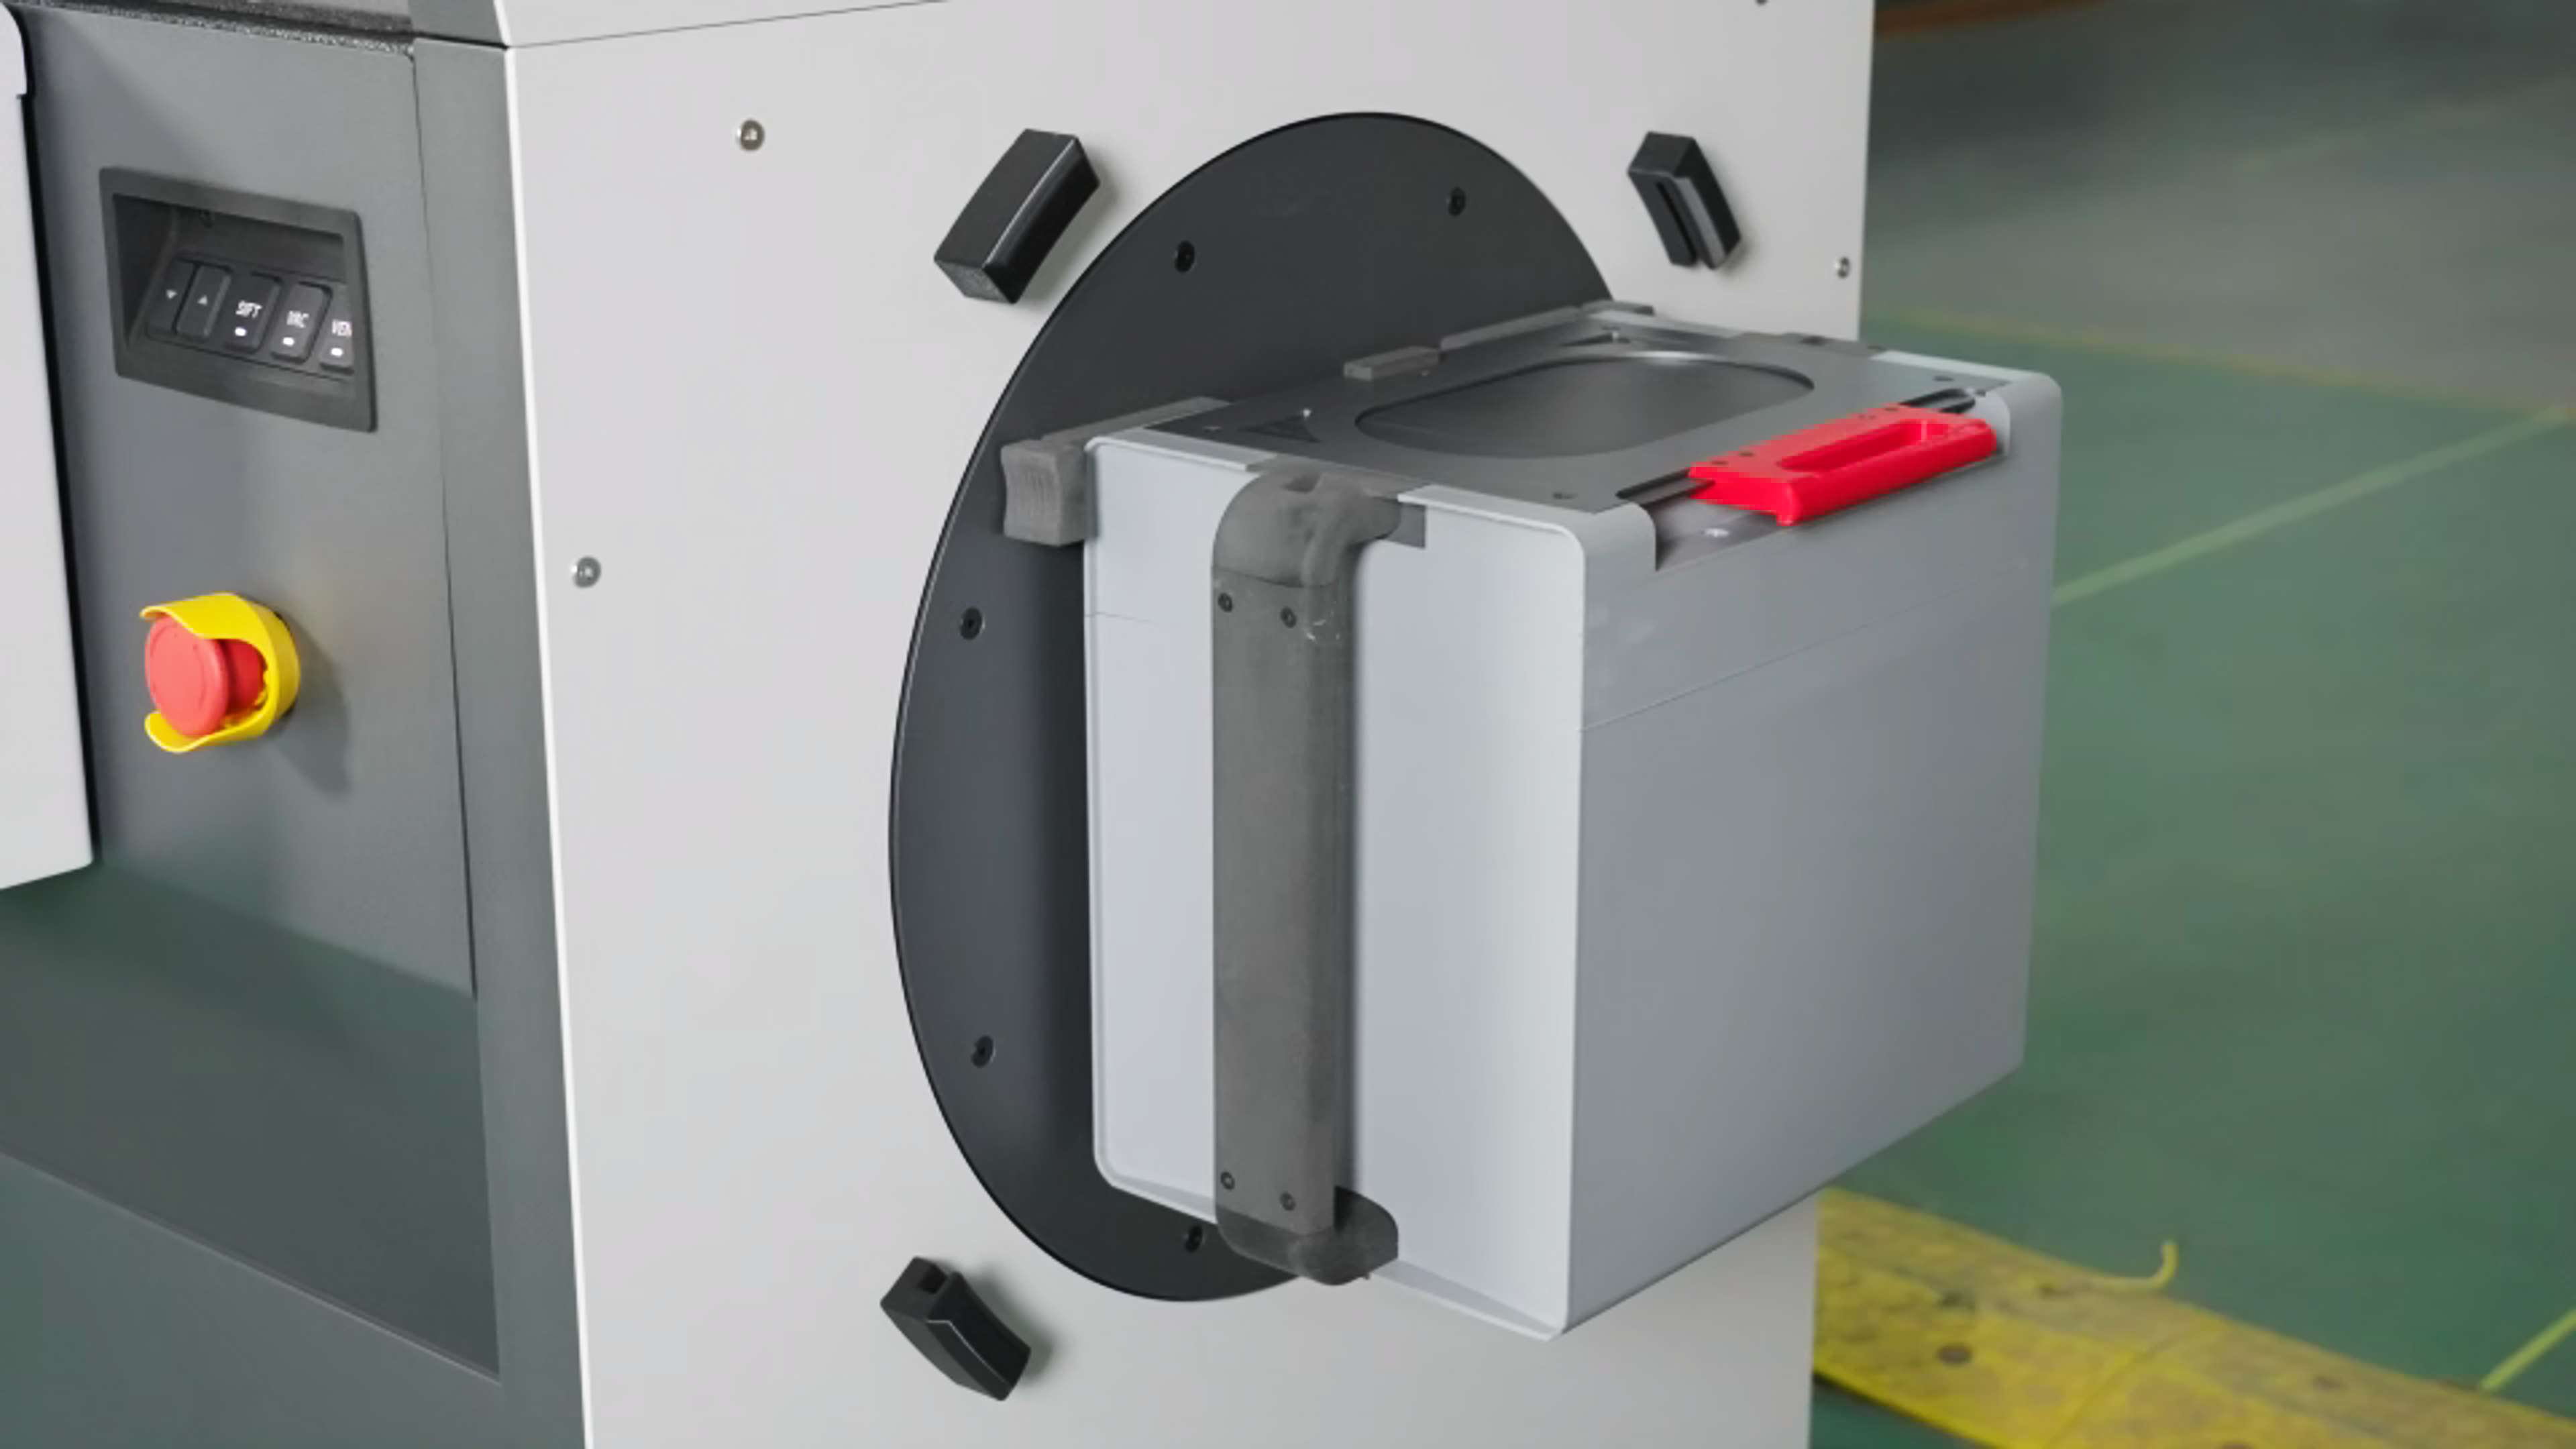
After the powder is mixed, close the lid of the cartridge and transfer the cartridge to the mixing station on the right side of the machine. Align the long slot below the cartridge with the snap under the mixer, and align the two slots above the cartridge with the snap above the mixer.
-
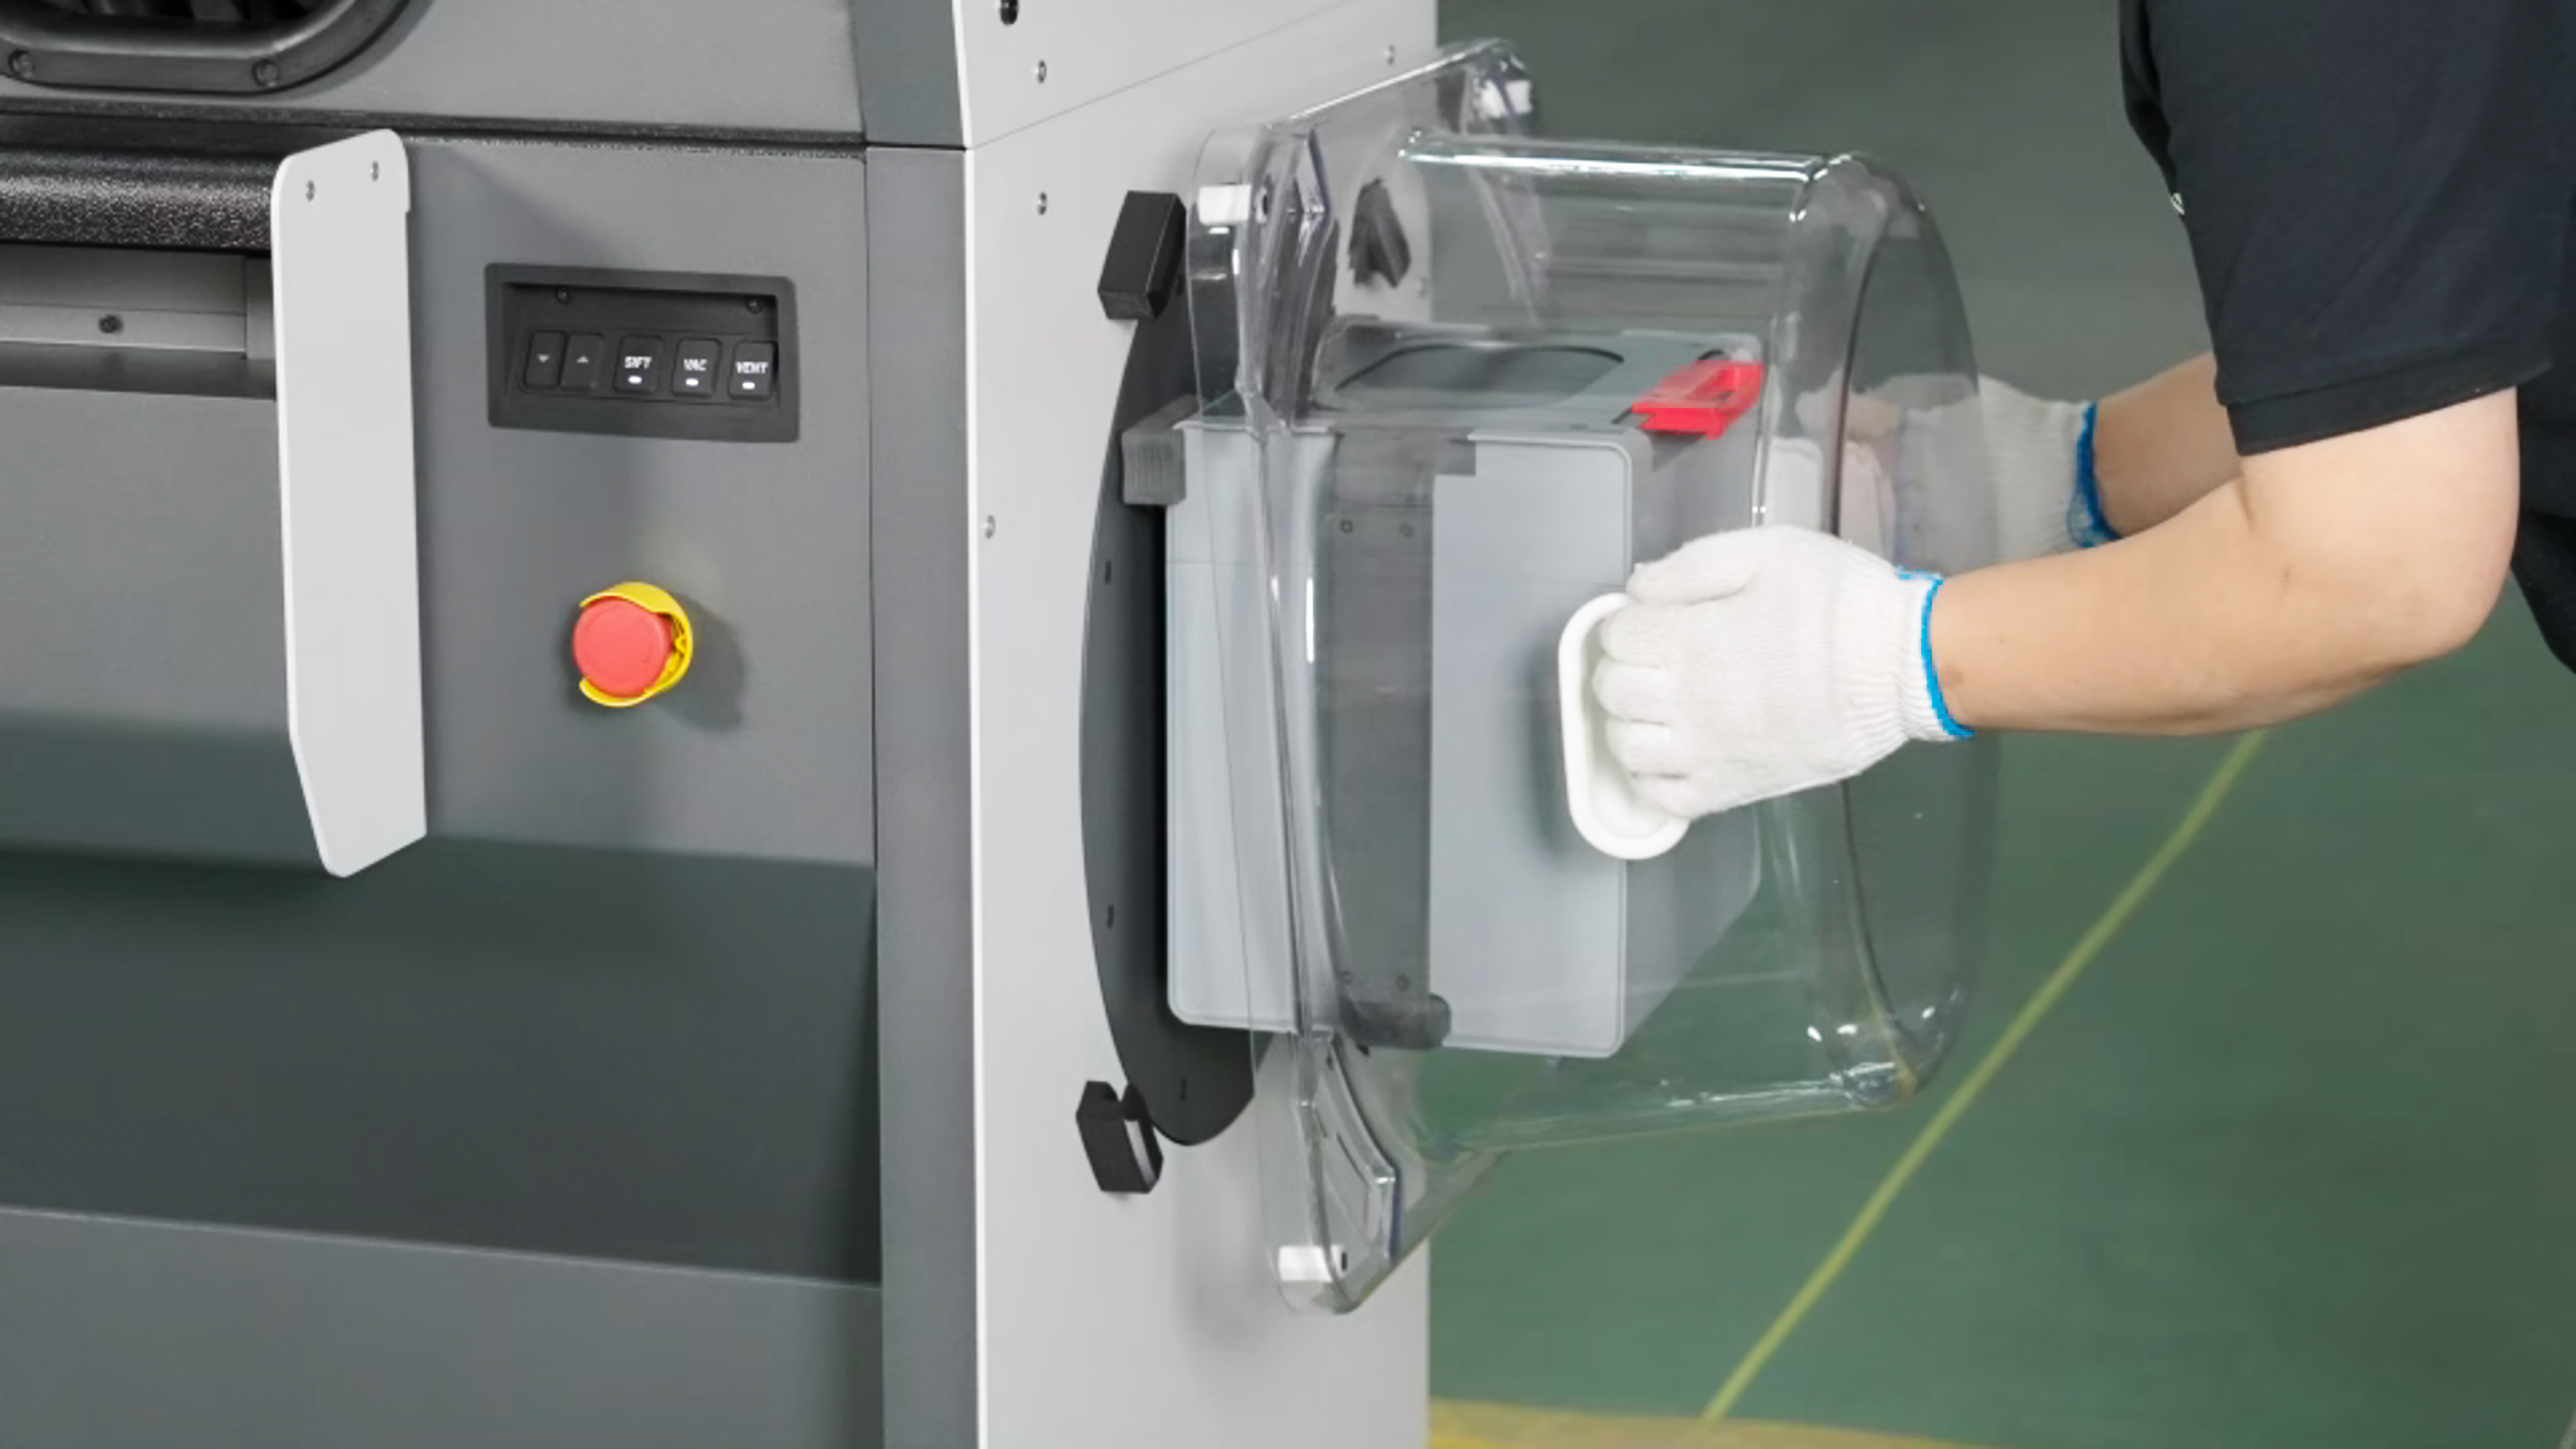
Cover with the transparent protective cover, making sure it is secured to the clips.
-
Click the "Mix" button on the touch screen to let the C220-P mix the powder until it stops.
-
After mixing the powder, remove the transparent protective cover, and then pinch the buckle to remove the powder cartridge.
-
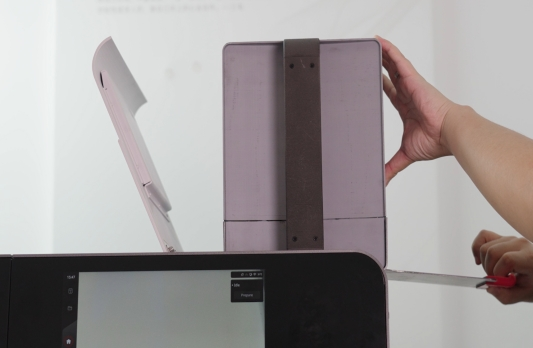
Transfer the cartridge to the top of the RMS220 hopper. Open the cartridge cover. Place the cartridge upside down on top of the hopper with the handle (red part) facing outward.
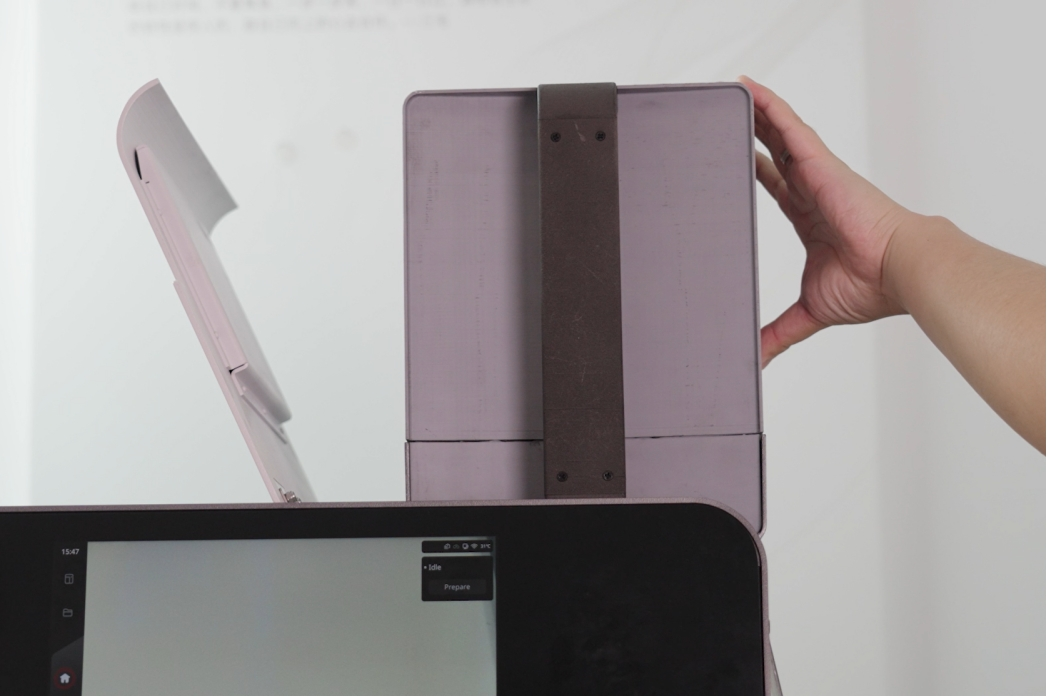
-
Pull the cartridge valve handle. Wait for the powder to fall into the cartridge. Do not move the cartridge, otherwise the powder will spill out. You can wait until all the powder has settled and fallen to the bottom of the cartridge.
-
Wait until all powder has entered the hopper. Push back the valve handle to close and remove the powder cartridge. Alternatively, you may leave the cartridge handle open to use it as a supplementary storage cartridge. The cartridge has a capacity of approximately 31.5 kilograms. Placing the powder cartridge on it will provide an additional 4-8 liters of powder, sufficient to complete a full printing build.